Farmhouse bathroom renovation- on a serious budget
I am the type of person who NEEDS a project. Adding recessed lighting, a new front door, fence, etc. was just NOT enough for me last weekend (apparently).
Easter morning, I could not sleep. It was about 6 AM and I was tossing and turning. So naturally, (like any obsessive person), I decided that this might be the perfect time to DIY the bathroom..obviously.
With the pup and husband still sleeping, I gathered all of my materials that I had been accumulating.
When we first moved in, our bathroom wasn't horrible. From what we understand, it was the bathroom of a teenage girl and that was exactly the feel it had.
Upon move-in, we immediately painted the room in a flat light blue by Behr Marquee: Charismatic sky. I then added a fun shower curtain and accessories, and to be honest our simple upgrade satisfied me for a while.
Taking this into consideration, I have always felt that quirky, beachy, and almost effortless decor would fit best in this area of the house.
So, here we are, Easter Morning and I am all geared up and ready to go!
Accessories:(yes, I started backwards on this project)
First, I decided to swap out the existing shower curtain for a simple white cotton piece with fun fringe accents from Target. It has great texture and is very good quality.
As soon as I hung up the curtain, it was like a breath of fresh air. It instantly gave the bathroom that crisp and clean look I was going for.
You may notice our pretty generic over-the-toilet cabinet peaking out in the corner of the above photo. It is pretty horrible...but I wasn't ready to give up on it just yet.
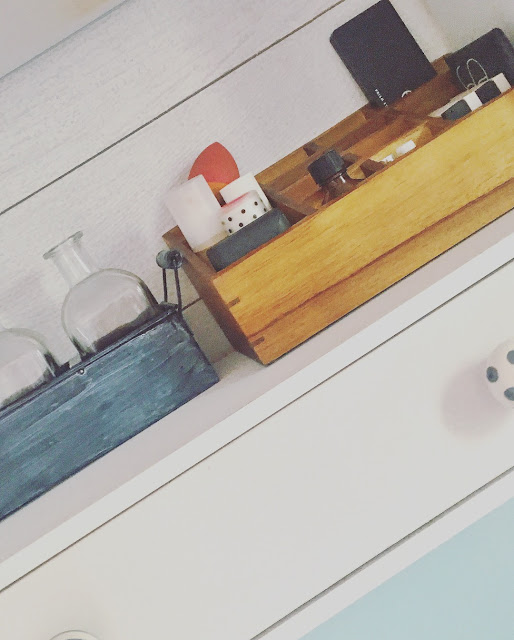
In order to repurpose this existing piece, I ordered some hand painted porcelain knobs in cute gray and white patterns from Amazon. They are super eclectic which was exactly what I was hoping they would be!
I love shiplap (who doesn't) and I am constantly looking for ways to use it in my home. Since we plan to eventually gut and expand this bathroom, I didn't want to invest too much money into installing high quality wall accents such as shiplap. My quick fix was some peel & stick wallpaper from Target. It was kind of a pain to be honest, definitely a 2 person project. But, I think it ads a cute accent to this super boring cabinet.
I decided to dress the cabinet up with some white hand towels I had and a decorative piece that I found at Michaels a few years ago. My new wood makeup organizer also from Target fit perfectly as well (wait till you see where I store my makeup brushes...basic girls you will love this). The cute little polka dot rug is from Burlington, and I have no idea where the rustic picture board is from as it was a gift...sorry! But, what I can show you, is where I got the CUTEST soap dispenser from...I am obsessed and I think you should be too.
I also happen to love my wooden plaque with mason jars that I use to hold my makeup accessories. I bought mine from Michaels 3+ years ago but a similar one can be found here.
Lighting: a great non-electrical solution
I am not educated on electrical in the slightest bit. But, what I did know was that our existing lighting fixture over the sink had to go.
I love the rustic, industrial, farmhouse, look that seems to be "in" right now and I thought that this black piece would compliment the white and pastel blues I was using in the room quite nicely.
I found Edison bulbs off Amazon and purchased the daylight white 5000k pack of 6. Let me tell you, these babies are BRIGHT- perfect for a bathroom makeup application! Again from Amazon (who doesn't love Amazon?!),I purchased a 4 pack of industrial vintage style cage lights. The lights slipped right over the Edison bulbs that I screwed into my existing light fixture over the sink.
I love chalk paint
I love chalk paint, did I mention that??? Our cabinet was a classic honey colored particle board "Home Depot special". Since we were considering buying a new one anyway, I figured that if I tried to paint it and it backfired, it wouldn't be too much of a loss- that's how things works right?!
I must admit, I am kind of lazy when it comes to painting. I REALLY didn't want to take the doors off, sand, and prime them. So, I took the lazy 6 AM route and just started going to town. I used my can of Annie Sloan chalk paint in "old white" that was left over from our DIY kitchen island (let me know if you would like to see a post on that!) to cover the medicine and bathroom cabinets. I purchased mine from a local antique shop, but you can also purchase it here.
I continued to break the rules of chalk painting by using whatever paint brush I had laying around. My paint is old so I added a little water to thin it out a bit, from there, it went on like a dream!
Donzeo and under one hundo
So there we have it: a DIY bathroom upgrade on a serious budget. I know this remodel isn't perfect, but I don't think I really wanted it to be. Again, I wanted to emphasize the quirkiness of the room and play up the beach vibe...mission accomplished.


Comments
Post a Comment